 FrameAgain
Bring a clear reference
Use the clearest copy of the original you have. If it is a print, a straight scan or photograph of the print gives you a reference to carry. Keep the original image proportions and as much of the scene as possible while finding the viewpoint.
Look for details that are still identifiable: a doorway, window corners, a wall meeting the ground, a rock or a distant ridge. National Park Service repeat-photography guidance emphasizes these stable landmarks when locating an old view.
Find the camera position before refining the crop
Start near the likely spot and compare more than one landmark. Look at a nearby edge against something farther away, such as a fence post against a window. Move the phone left or right, forward or back, and change its height while watching how those details line up.
When the near object matches but the background sits elsewhere, try changing your position before relying on zoom. Zoom adjusts the frame; moving the camera changes the viewpoint. The USGS repeat-photography example shows why camera position, height and field of view all matter when recreating an image with different equipment.
Use the overlay to make small adjustments
In FrameAgain, save the reference in a Frame and open the camera. Lower the reference visibility until you can see both the old image and the live view. Compare the stable edges as you move, then refine the zoom and framing.
Keep the phone’s orientation in mind. If the reference is turned, use the reference rotation control. Fit and Fill change how the reference occupies the view. Check the scene’s edges as well as its center before settling on a composition.
- Find a recognizable camera position using the background.
- Check the camera height and the alignment of near and distant details.
- Refine the orientation and framing while both images remain visible.
- Fade the reference down to inspect the live scene before taking the photo.
Take a clean photo, then compare the pair
FrameAgain saves the new photograph without the reference overlay. Open Then and Now together and check the landmarks again. Wipe helps you inspect an edge across both images; Side by side gives each photograph its own space. Overlay and Blink offer other ways to see the differences.
Take another attempt if a framing difference distracts from the change you wanted to record. Keep the old image and the new capture as separate photographs so you can return to each later.
Leave clues for the next visit
If you expect to return, keep a note of the spot, camera height and framing you used. For a plant or room, a recognizable support or position marker can help you set the phone down in the same place next time. Record the dates so the comparison keeps its timeline.
Choose a Frame for one reference and its retakes, a Series for the same view over time, or a Collection for several separate places or references. When reviewing a series, decide whether to line up against the original or a previous photo and keep that choice consistent for the comparison you want.
Sources and further reading
Bring the old photo into the viewfinder
FrameAgain puts your saved reference over the live iPhone camera, with visibility, rotation, Fit/Fill and zoom controls. Move the phone to line it up, take a clean photo, then compare and share Then & Now. Your references and retakes stay together in the project, ready for another visit.
Free on iPhone · No account
See how FrameAgain works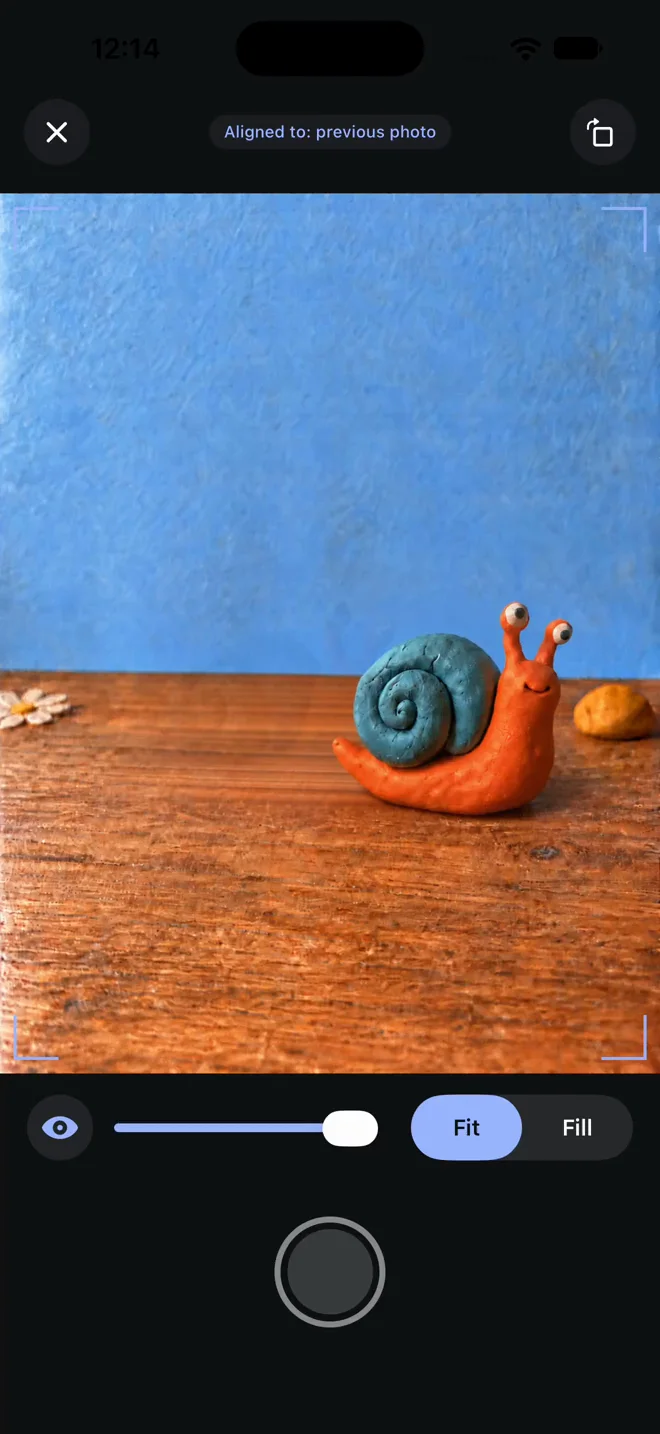
Questions
Does the old photo appear in the photo I save?
The reference guides the live view. FrameAgain saves the new capture as a clean photo, with no reference overlay. You can make a Then & Now comparison separately afterward.
Will FrameAgain automatically match the old camera position?
You choose the viewpoint and move the phone. The reference overlay helps you compare the composition while adjusting position, height and framing; matching an old image may take several attempts.